This post may contain affiliate links.
Do your kids either one, constantly ask for snacks or two, always want dessert type foods? If so, then these monster cookie protein balls are the answer to your parenting prayers.
As a dietitian and mom, I’m always on the lookout for snacks that provide valuable nutrition, fill my kids up (good bye snack requests every five minutes), and that also taste delicious.
These monster cookie protein balls are jam packed with protein, fiber, iron, and your kids will love them!
Table of Contents
Are Protein Balls Healthy?
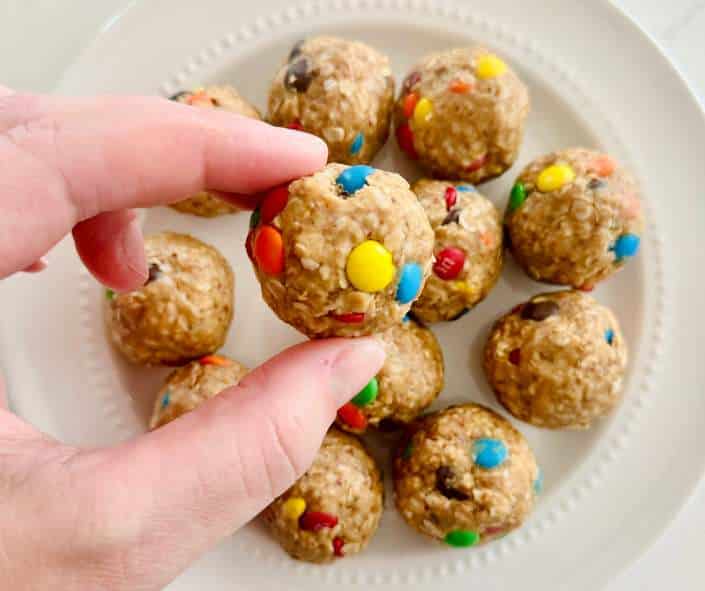
What I love about protein balls, also knowns as bliss balls, is how you can get so much nutrition from one little ball.
While yes, these protein balls do contain some added sugar and a lot of calories for one ball, I prefer to look at what a food is adding versus fearing any ingredient or nutrient. So let’s take a look at what the main ingredients are providing.
The base of all my protein balls recipes contain peanut butter, quick oats, and ground or milled flaxseed.
Peanut butter – healthy fats, protein, fiber, and iron
Quick oats – protein, fiber, and carbohydrates
Milled Flaxseed – protein, fiber, and iron. Plus, Tinysprouts has added probiotics too!
What You’ll Need to Make Monster Cookie Protein Balls
If you or your kids enjoy regular monster cookies, then you’ll love these monster cookie protein balls.
They’re quick, easy, have only five ingredients, and require no baking!
Ingredients for Monster Cookie Protein Balls
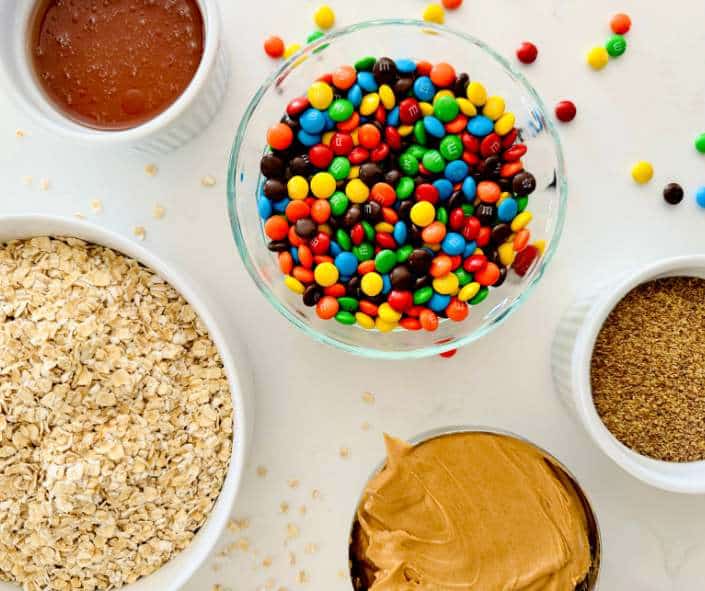
- Quick oats
- Ground flaxseed – I like to use TinySprouts Milled Flaxseed
- Honey
- Nut or seed butter of choice – I like to use natural peanut butter without any added sugar
- Mini M&Ms – or substitute crushed YumEarths Chocos for a dye free option
Equipment for Protein Balls
- Mixing bowl
- Spatula
- Measuring cups
- Scooper – optional, but makes scooping uniform bliss balls easy!
- Parchment Paper
- Baking sheet
How to Make Monster Cookie Protein Balls

The hardest part about making these monster cookie protein balls is stirring all the ingredients together. Sorry, but you’re going to have to get your hands dirty.
You’re welcome to use a mixing spoon or rubber spatula, but eventually you may have to get your hands dirty. I recommend taking off any rings for this part.
The mixture might seem too sticky at first, but give it time. You’ll need all that stickiness to “glue” everything together. But, if you feel like your protein ball mixture is still too sticky, add a little more quick oats, a 1/4 cup at a time.
And if your protein ball mixture is too dry and isn’t sticking together very well, add more nut butter or honey.
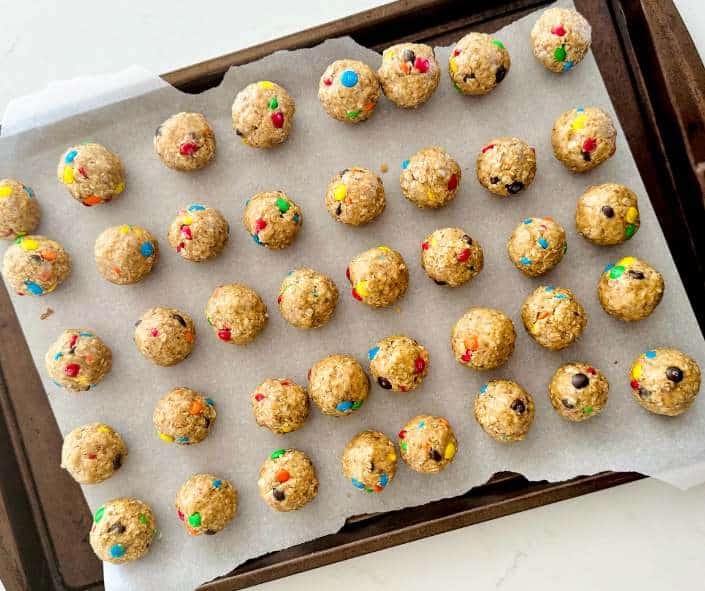
Once your monster cookie mixture is well combined, roll 1-2 tablespoons into a ball and place on a parchment-lined sheet tray. I like to use a scooper for this part to make consistently shaped protein balls.
Once you have all your monster cookie protein balls rolled out and on your sheet pan, place them in the freezer for a few hours or overnight until they are individually frozen. I like to lay a piece of parchment paper down on the sheet pan so I have less dishes to wash.
From here you can place them all in an airtight container or freezer bag.
I like to store my protein balls in the freezer and pull out as needed since they thaw quickly. However, you can also store them in the fridge for a week at a time. Your bliss balls will last in the freezer for three to six months, but I promise you, they’ll be gone before then.
Variations
There are endless variations to these protein balls.. We made Chocolate Strawberry Bliss Balls recently and they were also a huge hit!
If you’d like to use a dye free chocolate candy, you can try YumEarth Choco Yums.
Keep the base ingredients: nut butter, honey, ground flaxseed, and oats and add your favorite mix ins:
- Mini chocolate chips
- White chocolate chips and craisins
- Reese’s pieces
- Shredded coconut
- Butterscotch chips
- Pistachios
- Freeze dried strawberries
How to Make Nut-Free Protein Balls
If you or someone in your house as a peanut allergy, you can still enjoy these monster cookie protein balls, but try using an alternative like almond, cashew, or sunbutter.
If you want to send these protein balls to school, but your school is but free, make sure to use sunbutter to avoid any nuts at all.
How to Store Protein Balls
Store protein balls in an airtight container or freezer bag in the fridge for seven days or freezer for three to six months. I love the Rubbermaid Brilliance containers!
What to Serve Protein Balls With
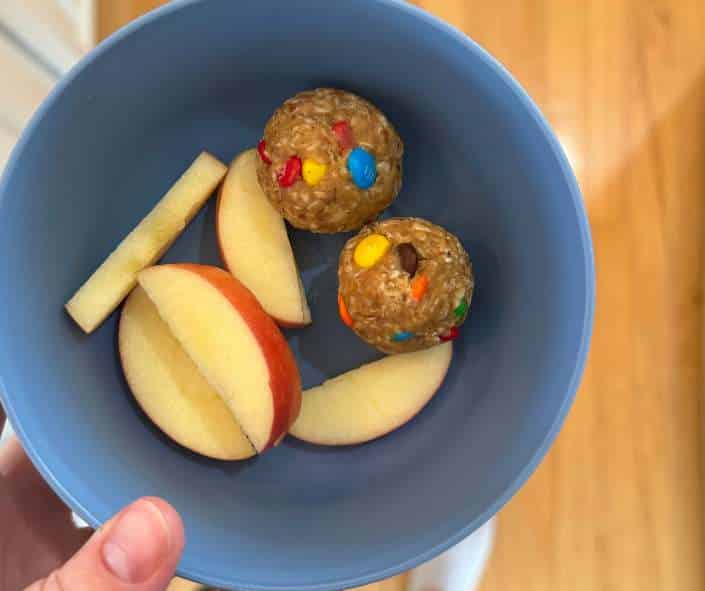
These monster cookie protein balls are great to enjoy by themselves, but I always like to pair a fruit or vegetable with any snack to either increase exposure to your picky eater or simply help you eat more fruits and vegetables in general.
Pairing Options for Bliss Balls
- Fresh strawberries
- Celery
- Apple slices
- Banana
- Orange slices
Other Recipes You’ll Love
Chocolate Strawberry Bliss Balls
Christmas Peanut Butter Bliss Balls
Strawberries and Cream Oatmeal
Smores Protein Balls
Equipment
- Mixing bowl
- Rubber spatula
- Measuring cups
- Scooper optional
- Baking sheet
- Parchment paper
Ingredients
- 3 cups Quick oats
- 1 cup Peanut butter
- 1/2 cup Ground flaxseed
- 1/2 cup Honey
- 1/2 cup Mini chocolate chips
- 1/2 cup dehydrated marshmallows
- 8 graham cracker squares crushed
Instructions
- Add graham crackers to an airtight bag and crush with your hands or meat tenderizer into tiny pieces. Mix all ingredients in a large mixing bowl until well combined using your hands as needed.
- Roll or scoop 1-2 tablespoons of smores protein ball mixture into balls and place on a parchment paper-lined sheet tray.
- Freeze protein balls over night or until frozen. Then place in an airtight container or freezer bag.

